
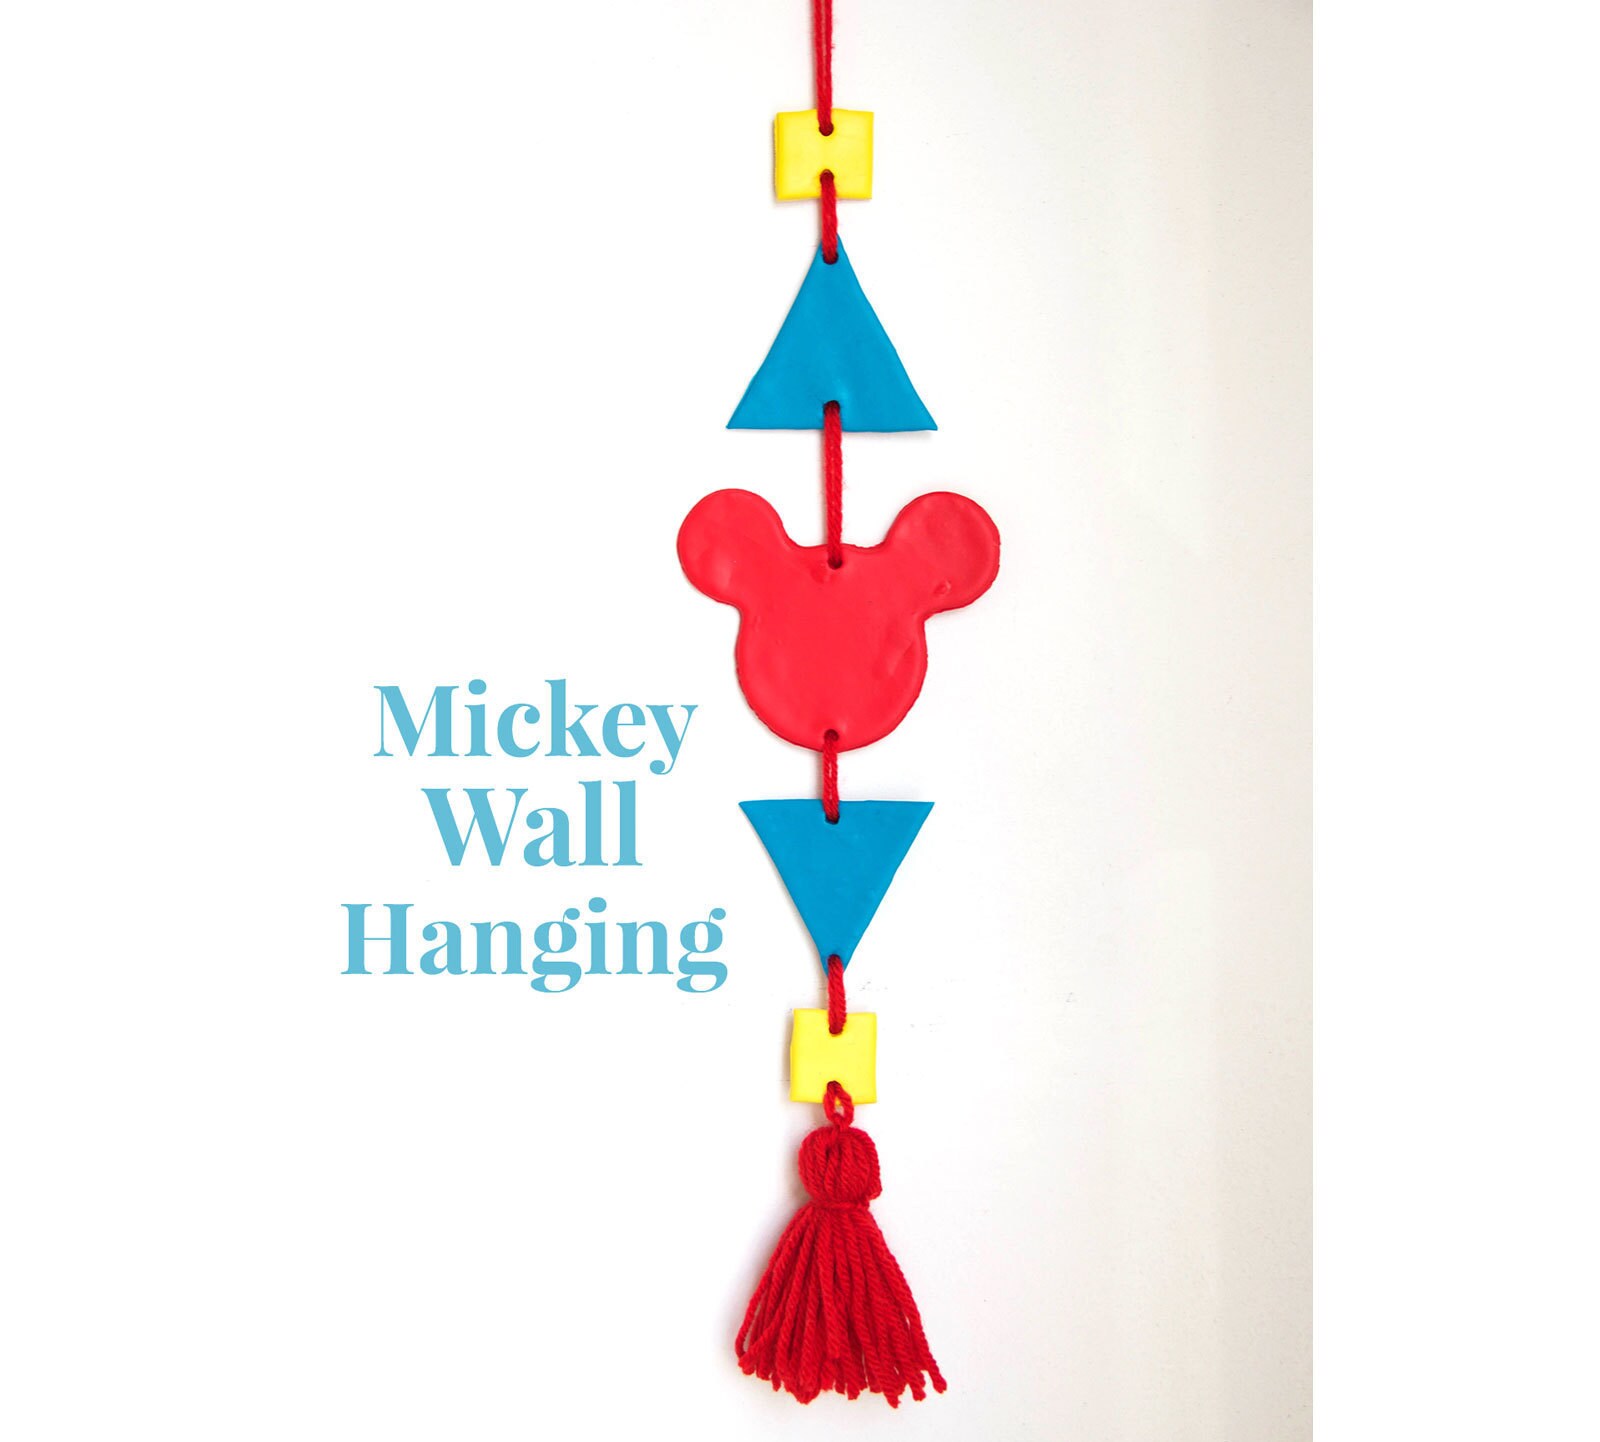
THIS MICKEY WALL HANGING MAKES THE PERFECT ADDITION TO YOUR HOME
Get ready for Lunar New Year with this red Mickey-themed décor that is so easy to make!
by Disney Family
That time of the year where we welcome loved ones into our homes for the festivities is here. Add a touch of Mickey flavour to the house with this clay craft that you can make with the whole family. And oh, boy, is this Mickey Wall Hanging easy to create. Try different colour combinations so that you can have one for each special day of the year!
What You’ll Need
• Oven bake clay
• Mickey cookie cutter
• Toothpick
• Yarn
• Scissors
How To Make It
1. Roll out the clay and cut out the shapes (two squares, two triangles). Use the Mickey cookie cutter to cut out the Mickey-shaped piece.2. Use a toothpick to create a hole on the top and bottom of each shape.
3. Follow instructions on the clay packaging and set your oven temperature.
4. Place the clay pieces onto a cookie tray and into the oven for the designated time.

5. Once you take out the tray, let the pieces cool completely. Paint them in your favourite colours. (We chose red and yellow to match the red yarn so that it looks especially festive!)
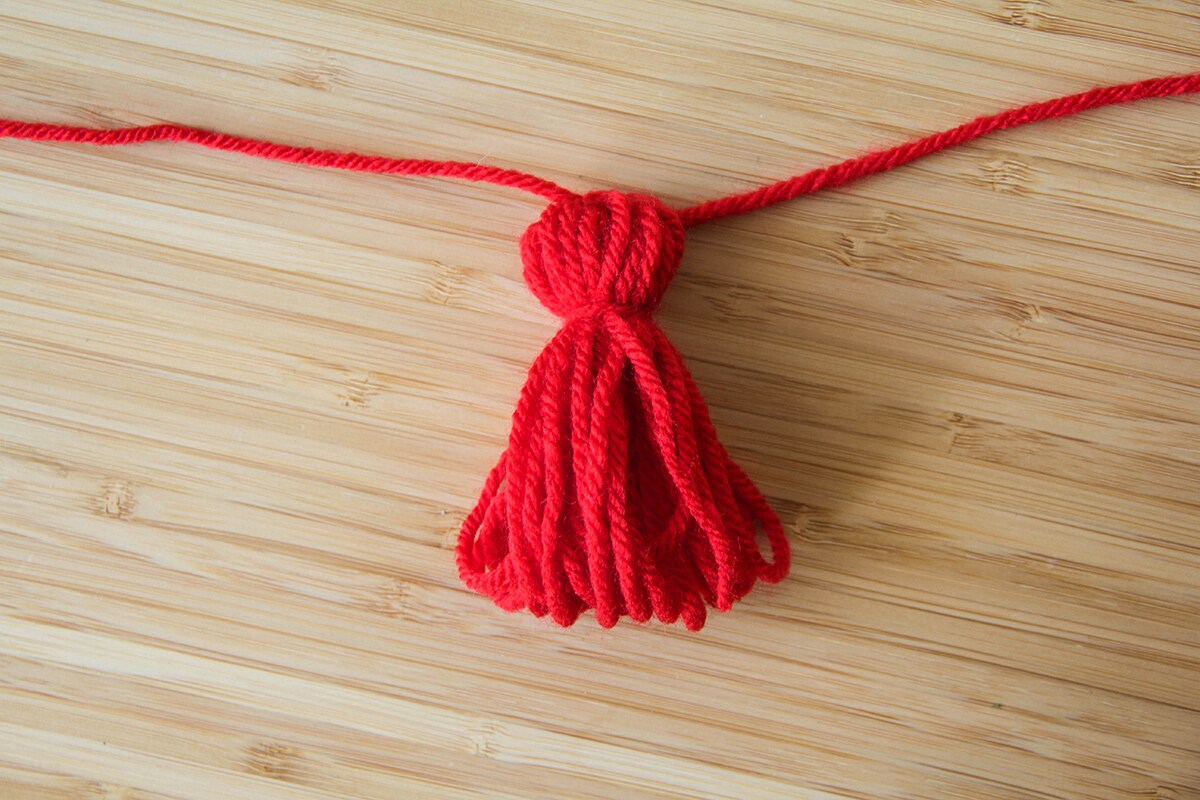
7. Tue another piece of yarn around the bunch under the first knot.
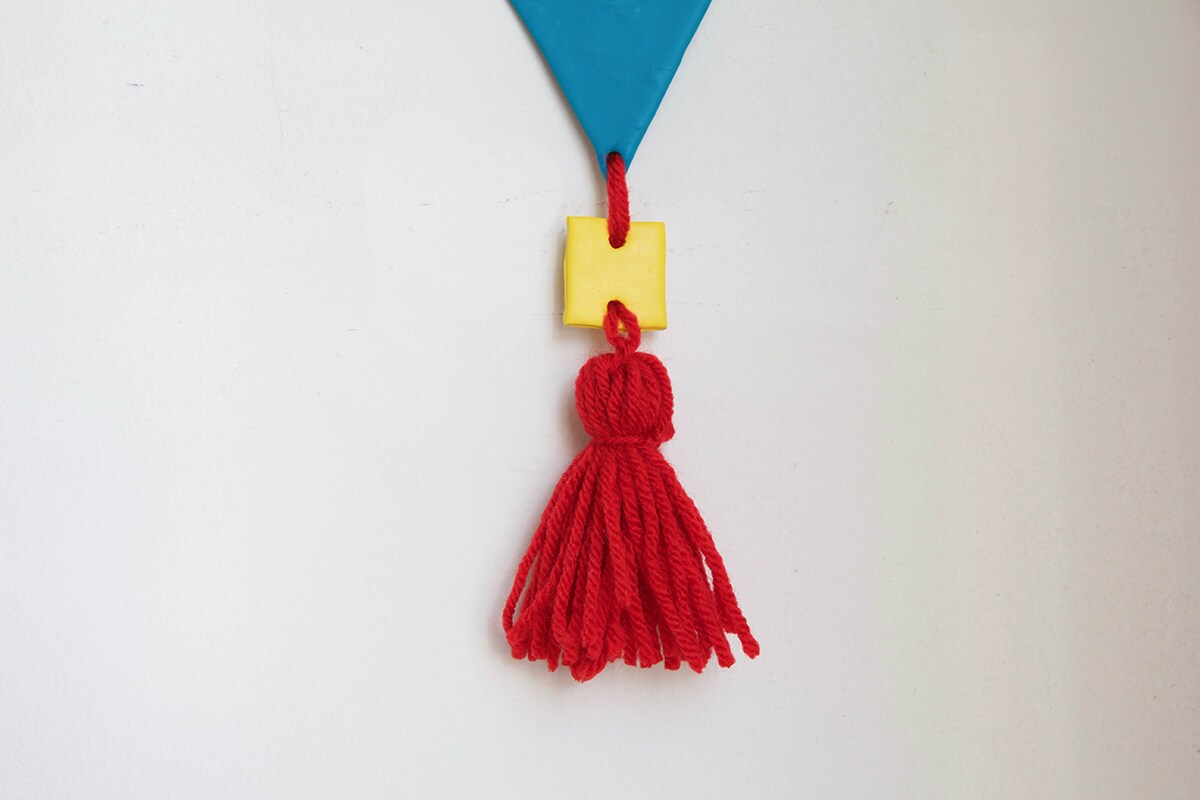
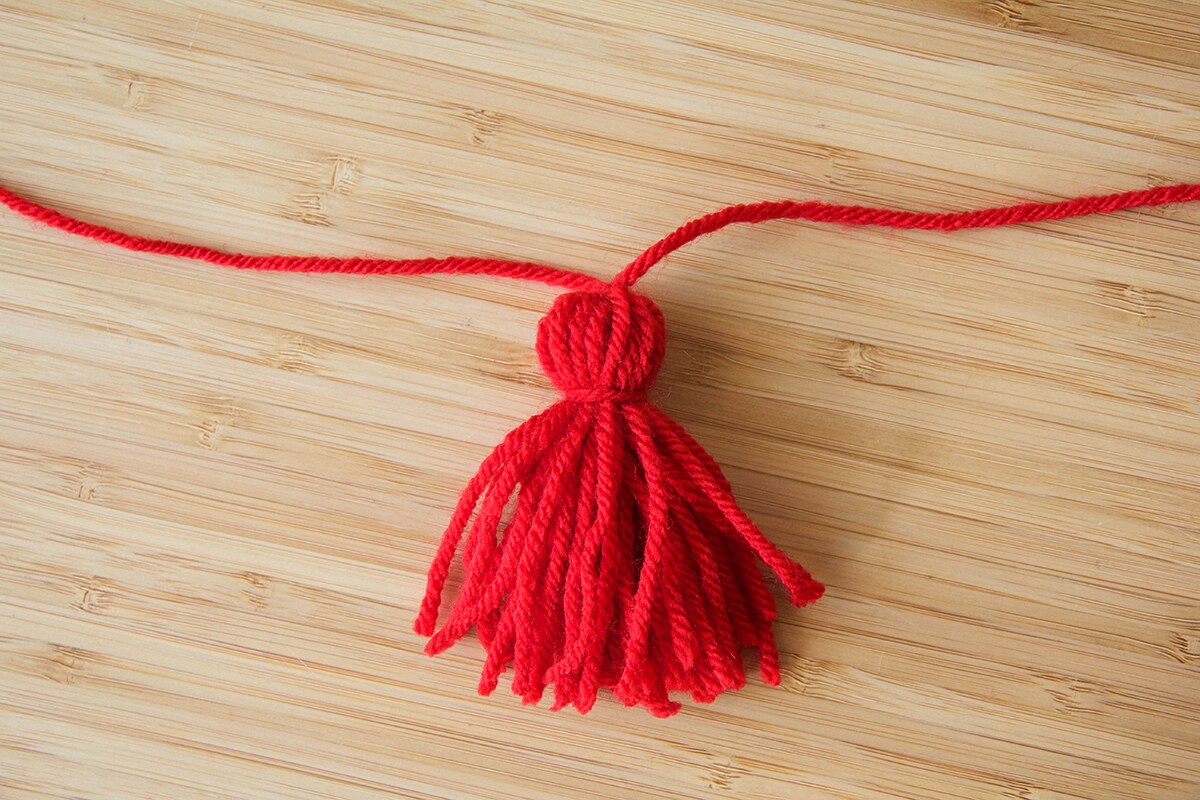
8. Trim the other end of the loops – there’s your tassel! 9. Thread all the clay pieces through the long piece of yarn attached to the tassel. Knot the end and hang your creation!
9. Thread all the clay pieces through the long piece of yarn attached to the tassel. Knot the end and hang your creation!